Sunday 16 November 2014

Quilted Pot Holder

My pot holder made with the help of Alice at Burwash Manor!

It's amazing what you can achieve in just 3 hours without distractions isn't it?

One Tuesday morning I had the pleasure of attending a sewing class at Burwash Manor just outside Cambridge. Eagerly 6 of us picked out fabric from Alice's basket then carefully and safely using a rotary cutter produced 9, 4 and half inch squares, which were then sewn together. Seams were pressed open. 

We then made the sandwich - this time with wadding and heat resistant wadding plus the backing fabric. Wadding was cut about an inch wider than the top and backing cut an inch or so wider than the wadding. 

Different methods of  securing the layers were used - we tried pinning and tacking, with a demonstration of spray adhesive. 

Next the fun part - quilting with the machine using the walking foot to help keep layers in line! Straight lines across the corners in the same direction.

Binding was a bit complicated but made easy by going to the class! Mitred corners are magic.  I think learning with a hands on approach is a great way to learn. A brilliant course. 

Friday 10 October 2014

Spinning those seams


A quick tip here on how to spin the seams in a four patch block.  This will work with pinwheels and will also work with nine patch blocks.  Why would you want to spin your seams?  It helps reduce bulk where all four seams come together…take a peek:
Three seams rotate in the same direction, one goes against the flow!
Most Four Patch blocks are pressed with the two-patch units going to the same fabric, in this case, they are pressed to the dark.  The long seam is usually pressed to one side. See Above.
Flip the seam back, the one that is going "against the flow".  The stitches should pop apart allowing the center to lay flat.
Flip the seam back, the one that is going "against the flow". The stitches should pop apart allowing the center to lay flat.
If the stitches in the seam don’t want to pop, help them along a bit with your seam ripper. See Above.
IMG_0593 01 arrow
Play around with it on Nine Patch blocks and Pinwheels.  Note that Pinwheel blocks are little more challenging because of all the extra fabric – but really neat and tidy when it’s all done!
With many thanks for Perkins Dry Goods

Tuesday 2 September 2014

Tutorial: Fabric Basket


::Materials needed::
Fabric:
Natural Linen: 1/4 yard for Basket Exterior and Handles
Pink Polka Dots Print: 1/8 yard for Basket Exterior
Pink Geometric Print: 1/8 yard for Basket Exterior
Flower Print: 1/8 yard for Basket Exterior
Green Rabbit Print: 1/2 yard for Lining
Other Materials:
Fleece Batting: 1/2 yard


First of all, cut out 2" squares from 3 different kinds of fabrics: 8 squares from each.
(1/4" seam allowance is included, so your finished square will be a 1 1/2" square)


Sew together two squares, making sure those two are different fabrics.
I made equal amounts for each set like in the picture: 4 for each set.


Press seams in one direction in the way that it isn't on top of each other.


Now Sew together pieces to create 2 6x2 patchwork layer.


When 2 layers are completed, press seam open like this.


It should look like this when you flip them over.When the same fabrics are not
next to each other like this, it might look a little interesting.


Sew the patchwork layers to a 6"x9 1/2" piece of linen fabric.


Place a fleece batting underneath it. Fleece batting is stable and great for this purpose. Make it a little bigger than the top layer.


Pin the layers and sew along the line that separates the patchwork part and the linen part. Repeat this for the other side too.


Machine baste the both edge.


Cut off the excess batting.


Fold it in half right sides together and sew the two edges like this.


Box corners (this link is helpful). Sew the line: along the seam from the pointy end to the needle it is 1 3/4". Repeat this for the other corner too.


Trim excess.


Let us move on to making handles. Cut out 2 - 2"x10 1/2" pieces of fabrics.


Sew them right sides together and press seam open.


Fold each side to the middle just like when you make a bias tape.


Fold in half and sew the edges like this.


Cut in half. Now you have two handles.


Sew the handles to the main basket.


Now let's make a basket lining. Fold in half a 12"x9 1/4" piece of fabric right sides together and sew the two edges, leaving a lining opening(about 2").


Do the same as you did for the main basket.


Sew outer basket and lining together.


Turn the basket right side out through lining opening and pin like this.


Sew the top part of the basket. Hand-stitch opening closed.


Now your fabric basket is complete! Yeah!!

I would love to hear what you think of this tutorial and if you make it, let me know!

Thanks for your time to stop by this blog and reading my posting!;)


Edited to add: 
- All my tutorials are for personal use only. Thanks for understanding!

- Now this tutorial is available in a PDF format (so that you can finally 
print it out!) 

Edited to Add:
- I have had many people asking me to sell a license to sell their fabric baskets made from this tutorial. If you'd like to sell these as a part of your small business (up to 20 baskets/month), you can purchase the license here.

http://ayumills.blogspot.co.uk/2008/05/tutorial-fabric-basket.html

Great tutorial from Pink Penguin. Note the nesting seams!

Sunday 31 August 2014

Ziggity Mug Rug Tutorial ~ John from the Fat Quarterly Team


John from Fat Quarterly joins us with a quick and easy tutorial for the little “mini quilts” sweeping the sewing blog scene.
Don’t forget, we have issues of Fat Quarterly available for purchase in the shop. Each issue is full of original patterns and project ideas, articles and interviews. The talented sewists behind Fat Quarterly have joined us with a series of great posts, from their Guest Fat Quarter Packs to the ‘Fit for a Princess!’ Picnic Quilt tutorial and the Stepping Stones Block.
Enjoy John’s tutorial and join in the Mug Rug craze with your own Ziggity Mug Rug…
Greetings, Sew,Mama,Sew! readers! I’m John Adams and I blog over at Quilt Dad. I’m also a member of theFat Quarterly team, and we’re thrilled that Fat Quarterly is now available in the SMS shop. We hope that you’ll give our e-zine a try!
Today, I’m excited to share a little mug rug tutorial that I wrote especially for all of you in the Sew,Mama,Sew!community. “What’s a mug rug?,” you might be asking. To catch up on all things mug rug, check out Erin’s wonderful Mug Rug Madness posts. OK, ready to get started?
The Ziggity Mug Rug
Supplies:
  • 16 – 2″ wide strips of scraps, each 5″ long
  • Approx. 7″ x 13″ backing fabric
  • Binding
You’re going to start with a bunch of scraps, cut into 16 – 2″ wide strips. I used “Kingdom,” a soon-to-be-released line by Jessica Levitt for Windham Fabrics. Make sure that the strips are at least about 5″ long or so. Separate the strips into two sets of eight strips each.
With one of your sets of eight, pair up two of the strips and sew them together in the same manner in which you would sew binding strips together. That is, align them perpendicular to one another with right sides together as shown above. Sew the strips together with a diagonal seam from the bottom left corner to the top right corner of the overlapping section. Trim the excess fabric using a quarter inch seam and press the seam open.
Repeat this step with the remaining three pairs, creating four sewn strips containing a diagonal seam.
Repeat these steps with the other set of eight strips, but (***and this is important***) arrange the strips so that the strip on top extends off to the left, instead of to the right as you did with the first set. Because of this, your diagonal seam should extend from the bottom right to the top left of the overlapping section.
This will result in four more sewn strips containing a diagonal seam, but the diagonal seam should appear as a mirror image to the ones sewn from the first set.
Arrange the strips alternating strips from your first and second sets so that the diagonal seams create a zig-zag effect. Match the seams as shown in the picture above and sew the strips together.
Sew all eight strips together to create your mug rug top.
Your mug rug will now measure 12.5″ in length. Trim the width as desired. I trimmed mine down to 6.5″ wide. Baste, quilt, and bind the mug rug with a backing and binding fabric of choice.
The picture above shows the detail of how I quilted my mug rug. I stitched 1/4″ on the inside of all seams for a nice graphic design.
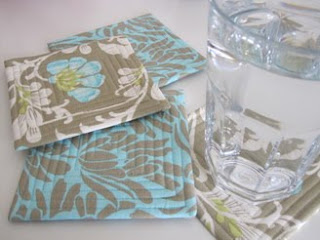
Here’s another version of the Ziggity Mug Rug made with “From Little Things” by Sarah Fielke for Lecien. Notice how I used fewer strips but added a fussy cut square to the top of the design. Feel free to customize the design to incorporate your own design elements! Another variation might be to offset the seams so that they don’t exactly line up.
I made a pieced back for this one and free-motion quilted it in an all-over pattern.
I hope you enjoyed this mug rug tutorial. If you make a Ziggity Mug Rug, we’d love to see it! Please be sure to add it to the Fat Quarterly Flickr group.
Thanks to Kristin and the Sew,Mama,Sew! team for hosting this tutorial, and for being such great supporters of Fat Quarterly!

Tuesday 26 August 2014

Dashwood Studio

Petite Street: available now

petite-signature
wendykendalldesigns.com
Wendy’s clean, graphic approach to design mixes playful patterns and textures with strikingly modern colour palettes. ‘Petite Street’ shows off her naïve hand drawn style mixed with geometric patterns creating a cool, modern collection, which will appeal to both children and adults alike.← back to collections

Thursday 21 August 2014

Bound Edge Quilt Coasters Tutorial

Neat coasters! Please follow the link for instructions.

http://flossieteacakes.blogspot.co.uk/2010/05/bound-edge-drinks-coaster-tutorial.html?m=1


http://flossieteacakes.blogspot.co.uk/2010/05/bound-edge-drinks-coaster-tutorial.html?m=1

Perfect for practising quilting.